Herb
How to Draw a Weed Plant: A Step-by-Step Guide for Beginners (Pictures Included)
In collaboration with artist Valisha Rogers.
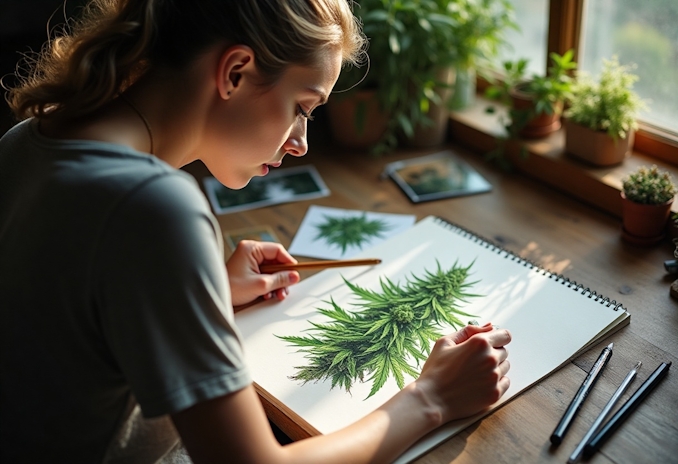
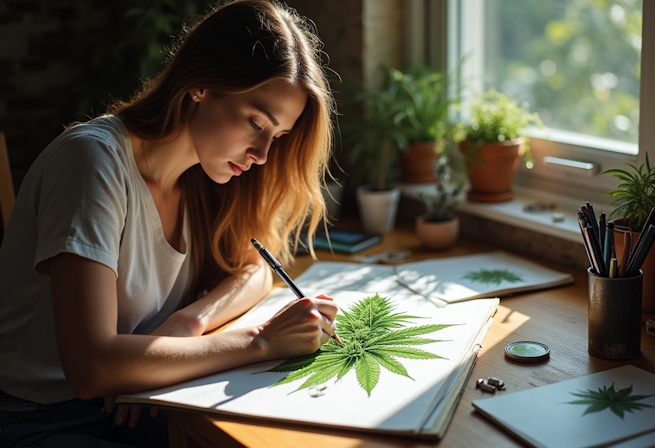
Whether you are an experienced artist just wanting to create some art for your walls, learning how to draw a weed plant can be quite the experience. From creating hyper-realistic pot leaves to cartoon buds, there are many creative ways to bring the cannabis plant to life in your art. Let’s get into how to draw a weed plant — but first, we’ll explore some of the artistic styles you might like to experiment with.
Drawing Styles to Try

Herb
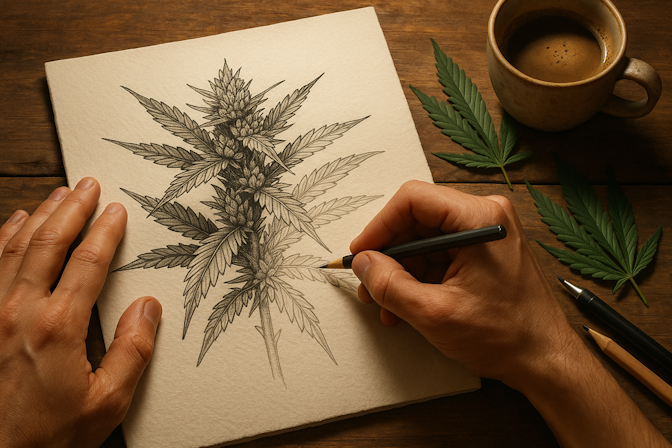
Realistic
Realistic art styles emphasize the importance of small details to ensure the accuracy and authenticity of the artwork being created. For example, when drawing cannabis, artists often focus on capturing extremely detailed fan leaves, displaying their accurately serrated edges. Furthermore, the depiction of plants filled with dense, colorful buds, each covered in shimmering trichomes, adds to the realism and vibrancy of the artwork.
Cartoon
Cartoon-style art focuses on amplifying expression, allowing the art to convey emotions vividly. This style embraces creativity and imagination, transforming ordinary objects and figures into delightful representations that capture the viewer’s attention and spark intrigue.
Abstract
Abstract art isn’t about perfectly copying what you see. Instead, artists try to give you a feeling or idea. They do this by playing with how things look – maybe turning simple leaves into intricate patterns, changing the shapes of plants, or using unexpected colors and textures on leaves. This freedom allows for lots of different ways to express things, and it makes for really interesting art that can be interpreted in many ways.
Materials You'll Need
Herb
The simplest way to get started is with just a pencil and paper, but if you want to level up your weed leaf drawing skills, consider grabbing some of these materials:
- Drawing pencils
- Erasers
- Fine line ink pens for cleaner lines
- Colored pencils, markers, or watercolor paint for color and depth
- Reference photos of a cannabis plant or cannabis leaves
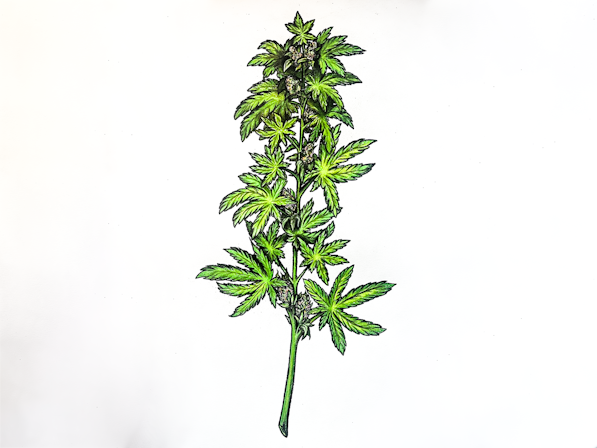
How To Draw A Cannabis Plant: Step-by-Step
It’s time to put the pencil to the paper and get started. Let’s break down how to draw a cannabis plant step-by-step. But remember, this art is your own, and you can change up any step to fit your desired artistic style and results.
Images are courtesy of Valisha Rogers from Party Paint USA.
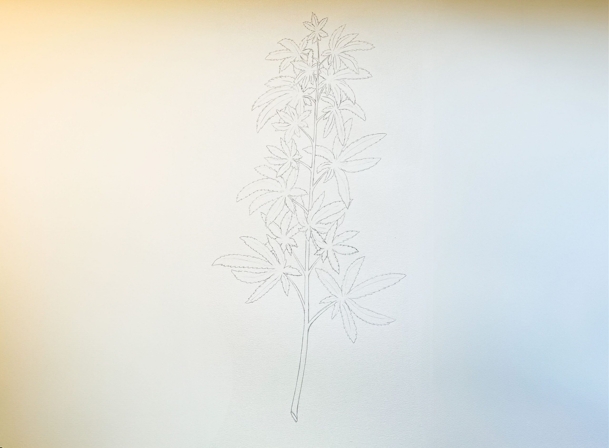
Step 1: Start with a Light Sketch
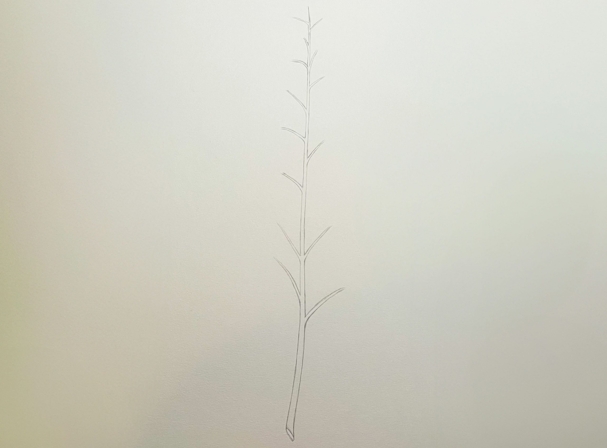
Valisha Rogers – Party Paint USA – @valishavilayart
The first step of drawing a weed plant is to start with an outline. You can begin by drawing the plant’s main stem, with several branches extending up the plant about one-third from the bottom of the drawing. The branches should be staggered upward at a 30-degree angle, creating a triangular shape, similar to a Christmas tree. To make the branches in a staggered pattern, you want to place them on opposing sides of the plant stem with a gap between each new branch on the stem.
Step 2: Mark the Outlines for the Fan Leaves
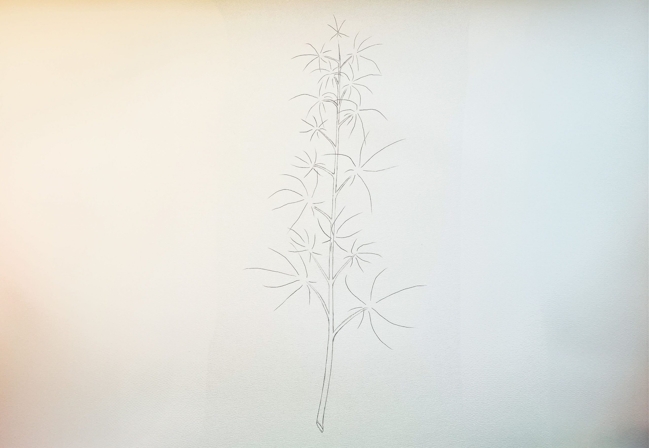
Valisha Rogers – Party Paint USA – @valishavilayart
Next, place your leaves by making 5-9 fanned out lines marking the center of each “finger”. These may resemble the shape of a bursting firework or the legs of a spider. Place these groups of guidelines symmetrically on the branches, not clustering them all together. Some overlap is ok, and will be cleaned up as you add substance to each leaf.
Step 3: Draw Leaf Shapes and Serrated Edges
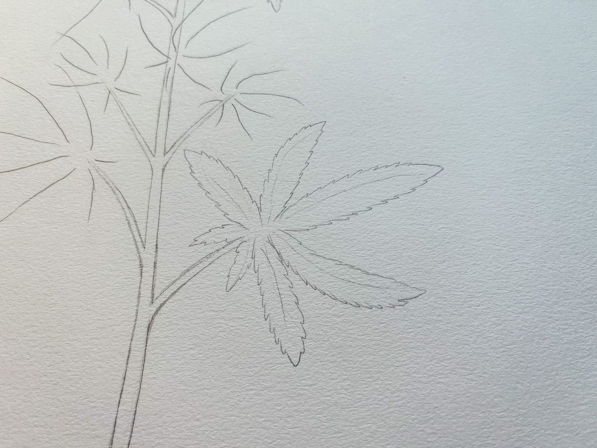
Valisha Rogers – Party Paint USA – @valishavilayart
You can begin drawing the individual fan leaf fingers within the outlined oval. Cannabis plants typically have between five and nine leaves on each fan. These leaves should be long with a slight curve and jagged edges. To make the serrated edges of the pot leaf, take your drawing medium and equally mark out the placement of the serrated edges. Draw outward at a downward angle from each mark until you have a fully serrated pot leaf. Next, you’ll want to erase any outline of the fan leaf within the serrated edges.
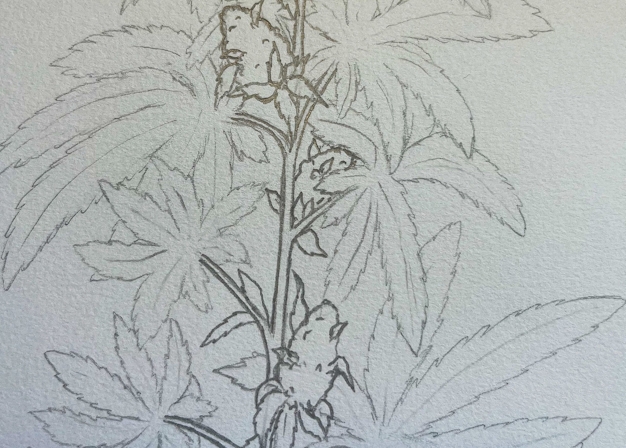
Step 4: Add Detail to the Stalk and Buds
Valisha Rogers – Party Paint USA – @valishavilayart
Now that you’ve drawn out the fan leaves on your branches, take your drawing medium and go over the stem and branches to make them thicker and slightly darker. After detailing the stalk and branches, you can begin to sketch the outline of your buds in between the symmetrical fan leaves placed on the branches.
Step 5: Layer in Texture and Trichomes
Valisha Rogers – Party Paint USA – @valishavilayart
Taking your focus back to the leaves, take your drawing medium and begin to shade the cannabis leaves, adding the veins of the leaf in detail. Then, you can add dotwork or stippling to the buds to indicate trichomes.
Step 6: Add Color or Effects (Optional)
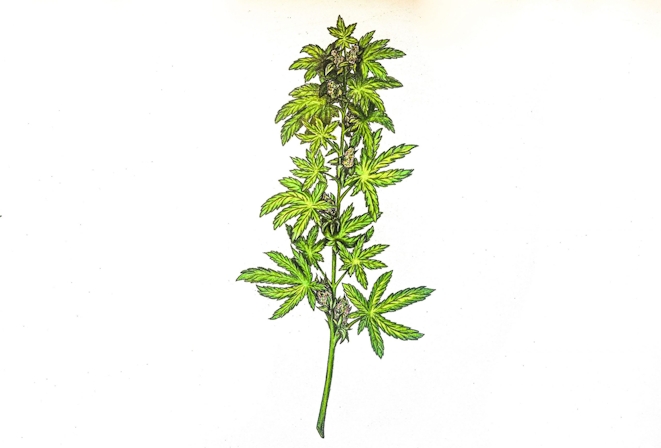
Valisha Rogers – Party Paint USA – @valishavilayart
The final step in the drawing process is to add your colors to the plant! Taking light green with some yellow, you can shade in the stalk and branches. Next, using a darker green and adding some purple hues, you can go in and color the leaves. Don’t forget to add small details like the orange and purple pistils on the buds, along with the milky white or amber trichomes and sugar leaves.
Step 7: Add an Outline (Optional)
Valisha Rogers – Party Paint USA – @valishavilayart
While this step is optional, it can add a bit of pop to your art. With a black fine-line pen, carefully trace around your sketch, outlining the stalk, branches, leaves, and buds.
Common Mistakes When Drawing Cannabis
Herb
Even the most experienced artists can make mistakes when drawing cannabis. Here are some of the most common mistakes people make:
- Too many or too few fan leaflets. Cannabis plants typically have between five and nine serrated leaves on the fan.
- Flat or identical buds. Cannabis buds are not uniform in appearance, can take various shapes, and display intricate layers of various colors and depth.
- Overdoing the serrated pattern. Keep the serrated edges on the weed leaf jagged but not too chaotic.
- Uniform leaf shape. As with the buds of the cannabis plant, the weed leaf is also not a uniform structure. The size and shape of the weed leaves vary on each plant, regardless of the variety.
Practice More With a Drawing Video
What to get some extra practice on your pot leaf art? Check out this quick tutorial video on How to Draw a Pot Leaf. Once you’ve got the pot leaf down, you may have an easier time creating the rest of the plant.
Herb Recommended Products:
READ MORE