This article contains sponsored content. Some of the products featured are part of paid partnerships. This page explains how our process works.

Herb
How Long to Dry Buds Before Jarring: A Complete Guide for Quality
Drying weed: a step that should never be skipped.
Drying and curing your weed is an important step in the growing process that can help boost the overall quality of your cannabis flower. Drying weed plants properly is essential for not only retaining the full flavor of the buds but also extending the shelf life of your cannabis flower. Rushing the drying process can leave you with undesirable results and buds lacking in overall quality.
In this guide, we’ll walk you through the drying timeline and signs to look out for when your bud is ready for the curing stage.
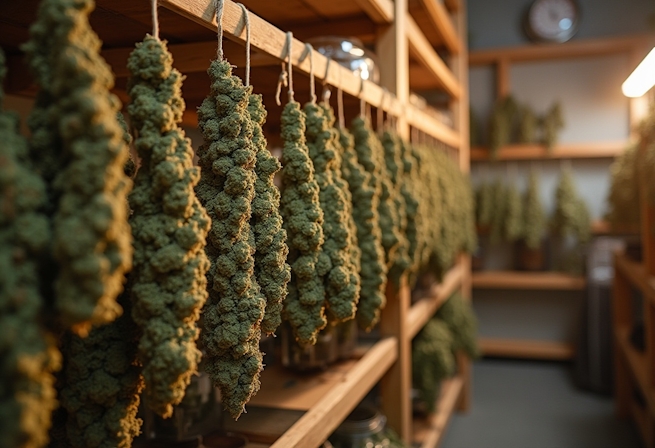
Why You Shouldn't Rush Drying Weed Plants

Crystalweed
Drying weed plants isn’t the most fun part of growing, but it is one of the most important steps. While trying methods to speed up the drying process may be tempting, rushing the process can compromise your flower’s quality, potency, and even safety.
Proper drying allows chlorophyll and other plant compounds to break down, which is what allows cannabis buds to smoke smoothly and taste clean. Fast drying doesn’t give these compounds enough time to degrade, leaving behind a harsh and unpleasant “green” taste. A rushed drying process can also lead to an underdeveloped terpene and cannabinoid profile, leading to noticeably weaker effects at the time the flower is consumed.
How Long To Dry Buds Before Jarring: Complete Timeline
Herb
So, how long should you dry buds before jarring them? Many growers agree that one to two weeks for proper drying is pretty accurate for most varieties of cannabis. But the typical timeline for drying buds can depend on variables like the drying method, air circulation within the drying room, temperature, humidity, the density of the buds, and how the plant was trimmed.
- Ideal drying environmental conditions: 60 to 70 degrees Fahrenheit with a relative humidity level of 55% to 65%.
- Rack Drying or Hang Drying? Compared to rack drying, hang drying may let more airflow circulate between the cannabis plant’s branches and buds.
- Dry trimming? Since buds are left surrounded by fan leaves during drying, moisture can get trapped in and slow the process down. It may take longer for the buds inside the fan leaves to dry, as they have more plant matter surrounding them.
- Smaller buds? Your plant may dry quicker due to the smaller size of the buds, which means there is less moisture content to evaporate. It may even take less than a week for moisture levels to be ideal.
- Dense colas or high humidity? If your buds are denser, you may need two whole weeks or longer to ensure they are properly dried. It may take your buds longer to dry if you can’t control high humidity levels.
Don’t get too hung up on following the calendar to a T. It can be more reliable to look for certain signs that your buds are ready for curing.
4 Reliable Signs Your Buds Are Ready For Jars

Herb
As we said above, drying cannabis isn’t all about relying on the calendar or a strict timeline. Instead, it can be helpful to pay attention to telltale signs that your buds are ready to move on to curing. Here are four simple ways to tell when your buds are dry enough to be jarred.
1. Stem Snap Test
The snap test is one of the most popular methods of checking to see if the plant is ready for the curing process. Grab a small stem or medium-sized branch from the main stalk or larger stems and gently bend it. If it bends slightly or feels rubbery, the plant isn’t yet ready to start curing. However, you know it’s ready if you hear a nice snap of the branch after bending it.
2. Dry on the Outside, But Not Brittle
Another simple method is to feel the buds on your plant. The outside of the buds should feel crisp and dry to the touch, but not too dry. Take a bud from your plant and squeeze it between your fingers. The bud should bounce back easily, letting you know that a good amount of moisture content has evaporated, making it ready to go in the jar for curing. Overly brittle buds mean the plant has lost too much moisture.
3. Buds are Separating from Stems
Another indicator that your cannabis buds are dry enough for curing is that they should pop off the stems with minimal effort. If you’re struggling to break them off from the stems, it may indicate too much moisture. If the buds snap cleanly away from the stems, then your buds are ready for the curing process.
4. Weight Stops Decreasing
Some growers like to weigh their plants during the drying process. While this isn’t necessary, it can help determine when the moisture levels are in the ideal range. When cannabis is freshly harvested, it contains a lot of excess moisture. As the plant enters the drying process, the moisture begins to evaporate, and the weight of the plant goes down tremendously. Once your plant has reached a consistent weight for around 24 hours, that is a sign your buds are ready to cure.
What Happens If You Jar Too Soon (Or Too Late?)

Terre Di Cannabis / Unsplash
The window between drying and jarring your weed is small and crucial. Putting your cannabis buds in sealed containers before they are dry can trap excess moisture, creating the ideal conditions for mold and mildew. This can also leave your buds smelling musky or like ammonia, along with making them unsafe to smoke.
If your buds end up too dry before curing, chances are they’ve already lost much of their terpene content—the aromatic compounds responsible for flavor and effects. Over-dried weed may be harsh, lack any flavor, and carry a hay-like smell, especially if the chlorophyll didn’t have time to fully break down.
The key is to jar your buds when they’re dry on the outside but still have a touch of moisture on the inside. Ultimately, curing is the slow, controlled process of drawing that inner moisture out and evenly distributing it, while preserving cannabinoids and terpenes.
How To Rescue Improperly Dried Buds
There are a few steps you can take to rescue buds that have been improperly dried. If your buds are too wet for curing, remove them from the jars and lay them in a dark, well-ventilated room with low humidity for a few hours until they dry out more. On the other hand, if your buds are too dry, you can use humidity packs, a small piece of lettuce, or orange peels to help bring back some of the lost moisture.
While these methods may not be a cure-all for all harvests, they may help you preserve the smokability, flavor, and effects of your cannabis flower.
Once Your Buds Are Properly Dried, Roll Them the Right Way
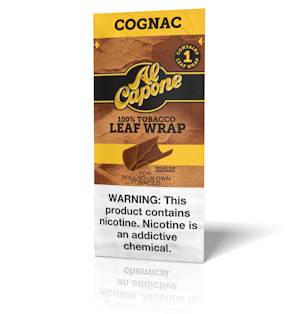
Once your buds are properly dried and cured, the fun part begins: rolling them up. For a harvest that only comes once a year, don’t settle for weak papers—upgrade to a tobacco leaf blunt wrap.
Al Capone cigar wraps are the gold standard for blunt lovers. Each one is individually packed so they’re always fresh, stretchy enough to roll without tearing, and comes with an adhesive strip for easy closure. The double-leaf design on these large blunt wraps gives it a slow, even burn that lets your flower’s true flavor shine.
Available in Rum, Cognac, and Original flavors, these wraps give your buds the grand finale they deserve.
Curing Buds in Jars: How To Do It Right After Drying

Crystalweed / Unsplash
Once your buds are dry, it’s time to begin the curing process. Curing cannabis flowers allows the aroma to fully develop and leads to a smooth, flavorful hit. You can think of curing cannabis like aging fine wine. Curing can make or break the overall quality of your harvested plant, so it’s important to cure properly.
We recommend curing buds in jars, specifically glass mason jars, for the best results, but if you don’t have those, any airtight container can do the job. Take your buds and fill the mason jars about three-quarters of the way, allowing for more airflow. Once you’ve put your buds in all their jars, store them in a cool, dark environment.
The ideal schedule is to open the jars every day for up to one to two weeks. This process is called “burping,” which releases excess moisture and gas buildup in the jar. After two weeks, cure for about two more weeks to get the best quality from your cannabis plant.
Want a full breakdown of the curing process? Check out our how-to guide!
Herb Recommended Products:
READ MORE